In this tutorial, I want to show you how to make a drone panorama by combining multiple photos together. In my case I like ships, but this can be applied to landscapes and other wide subjects, like a pier for example.
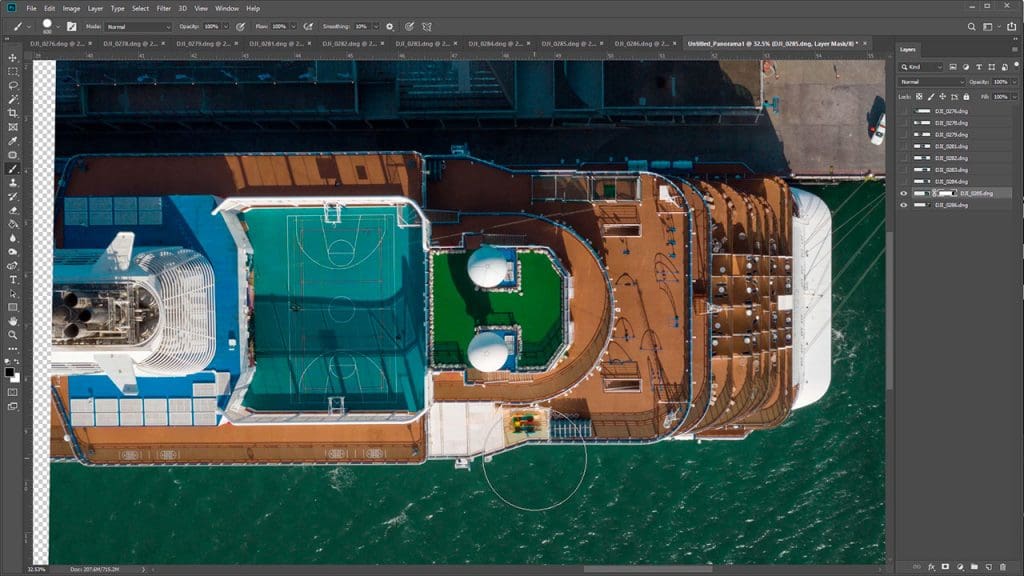
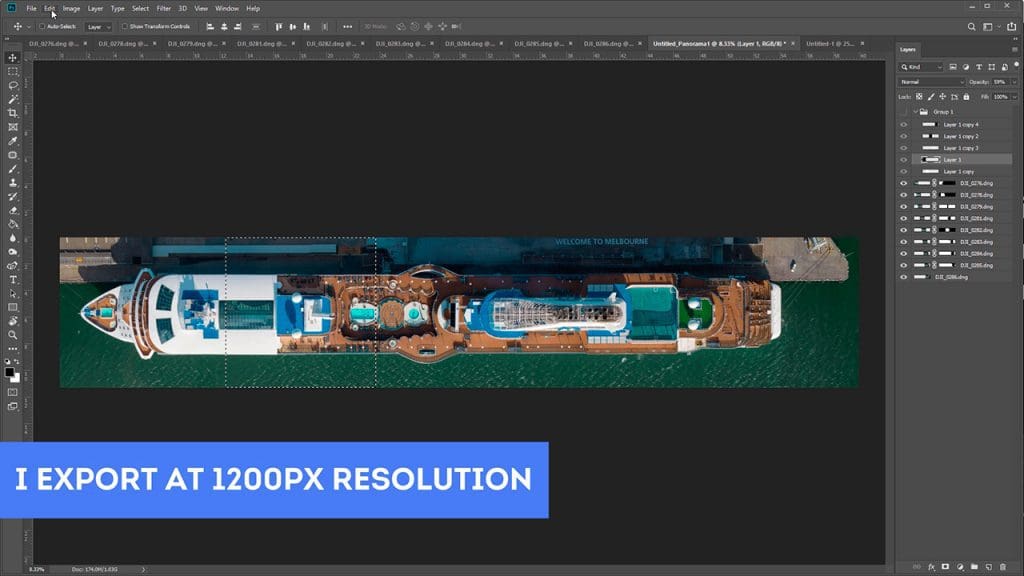
We will be creating this drone panorama. It's made up of 9 different shots. And it's almost 20,000 pixels long.
If you have pretty much any drone that shoots photos, Lightroom (which is optional), and Photoshop - you have all you need. So let's get started.
Let's begin with the shoot. Here are my 5 tips for shooting a drone panorama
- Try and shoot on an overcast day or with a clear blue sky, to avoid big lighting changes, that way the subject is fairly consistently lit. And of course, it's best to fly with little wind, to make it easier to keep the drone flying along a straight path.
- When shooting use all manual settings and once set don’t change them. If for example, you have the auto white balance set, and as you are taking the photos your auto white balance changes, your photos won't match and you will have to try and match them in
lightroom . - Remain at the same altitude. It's a lot easier to stitch the photos if the subject is the same size.
- Use
on-screen grid lines to help line up the subject. - Take a lot of shots to be safe. You don't have to use all of the photos, just chose the best ones.
Let's get started with the edit
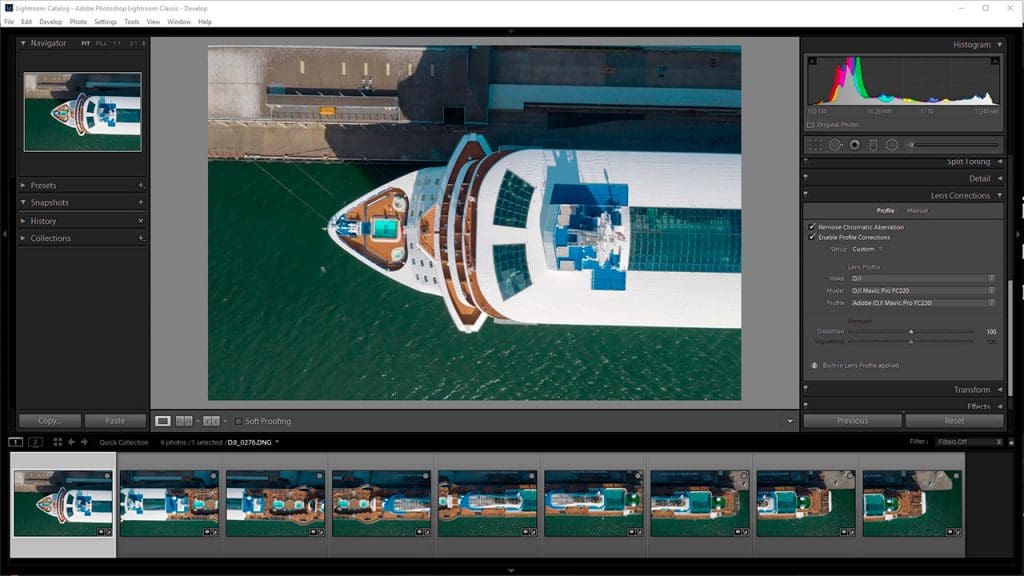
Bring the photos into lightroom. As you can see with this shoot, I wasn't able to keep the drone on a straight path, which will make it a little more tricky to stitch, but it's not the end of the world.
I shot this on a day with a clear blue sky, so I didn't have any shifts in lighting. I was able to just correct one of the shots and then copy the grade over to the rest of the shots.
Sometimes you might need to adjust some of the shots to match the others.
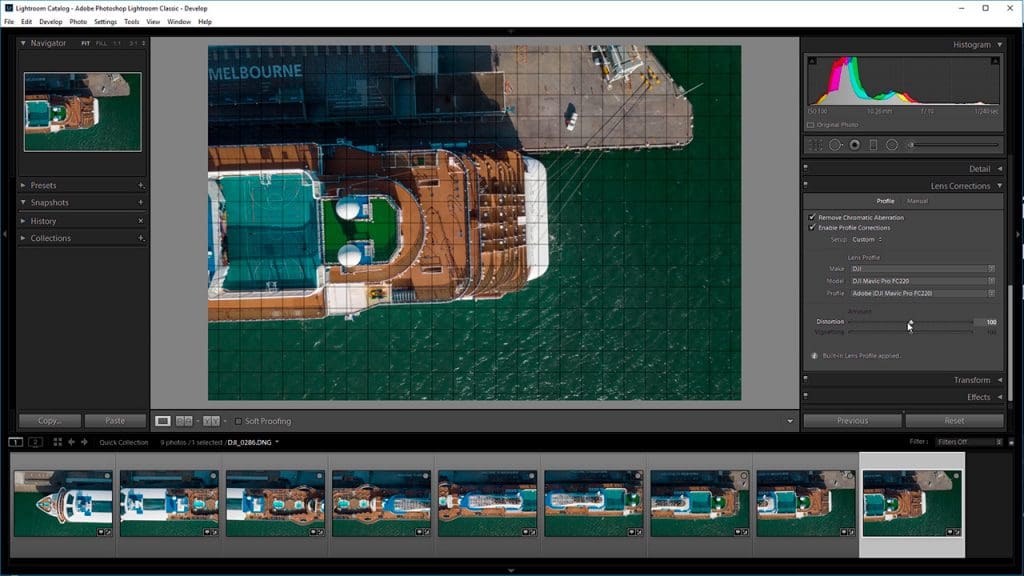
Use the lens corrections tab to remove some of the lens distortion. For the most part, the built-in lens profile does a good job, but it's not perfect. You can remove some of the distortion by applying a lens profile and tweaking the parameters until the lines in your photo are fairly straight, which will make lining up the photos much easier.
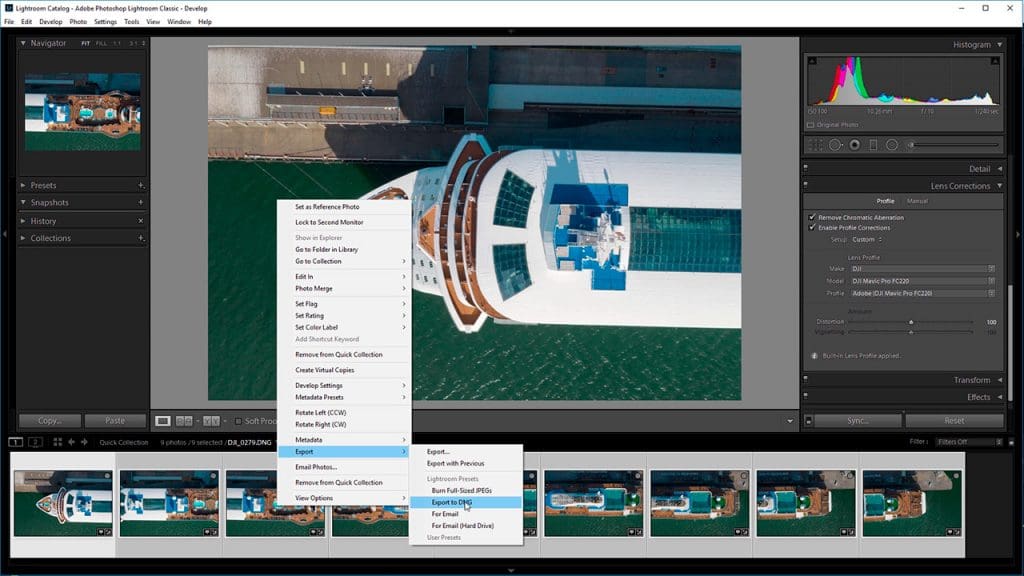
Once you have all your photos colour corrected, export them out as DNG.
Import all the photos into Photoshop. It's important to open them through Camera Raw to apply your camera raw settings from lightroom.
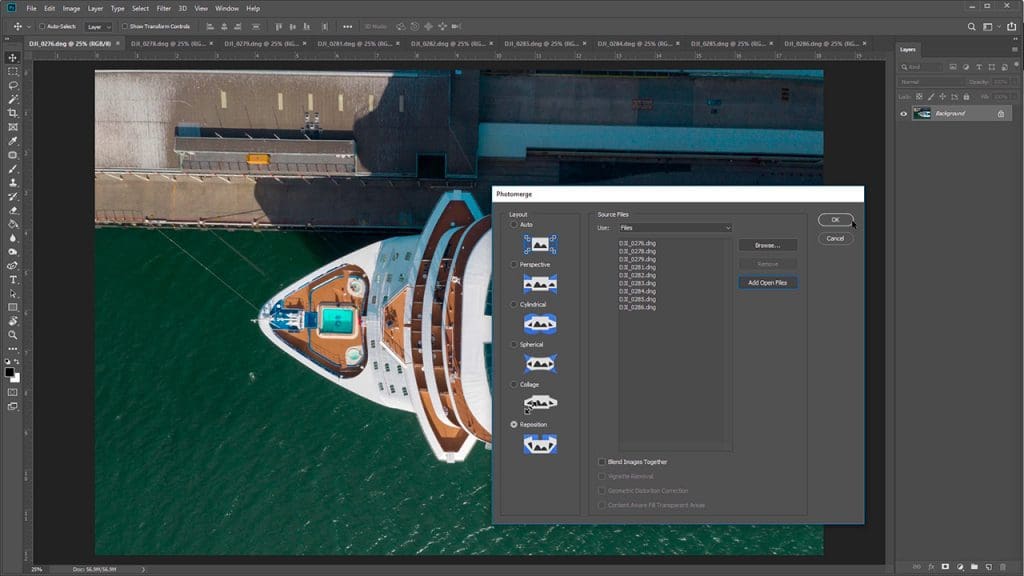
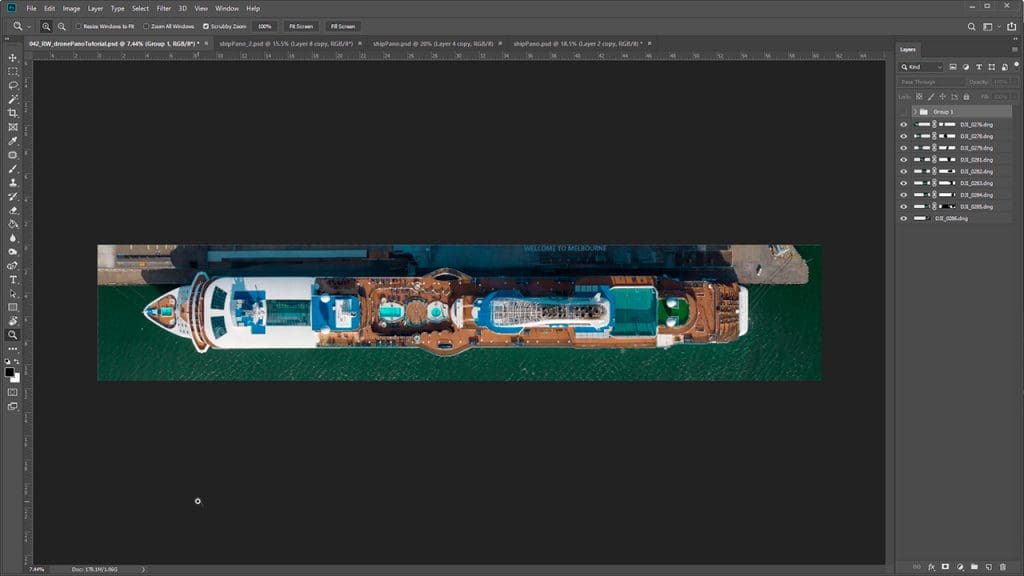
Now go to File > Automate > Photomerge. Click on add open files. Here you can skip the whole rest of the tutorial by just using the auto function. For simple panoramic photos, this might work, but for the most part, it hasn't worked very well for me. I like to use the reposition function, to get the photos roughly in the right place. Uncheck and blend images together, we will be doing that manually.
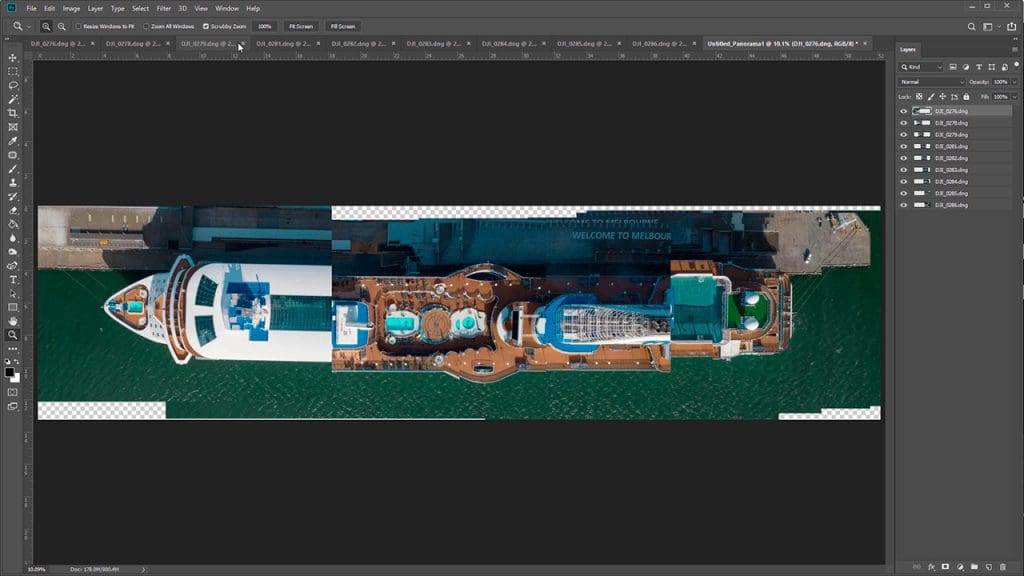
You will end up with something like this. The photos are roughly in the right place, but obliviously still need a bit of work.
Add guides
Let's bring up some guides to help us align the photos. Go to view > new guide > choose horizontal and enter 50%. This will give us a guide in the middle.
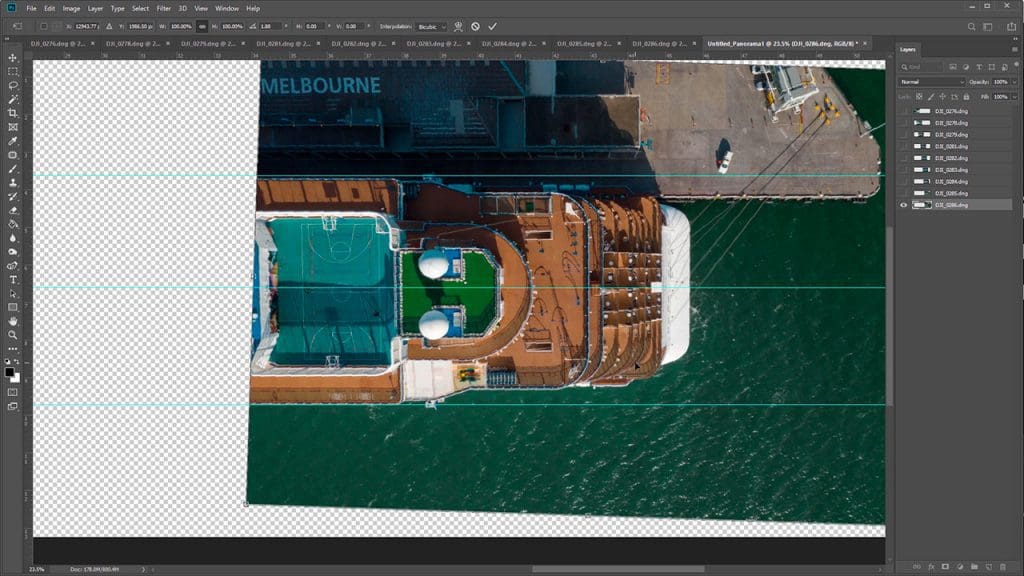
Now let's focus on one photo at a time. We will just be rotating and positioning the shots at this stage. Let's add another 2 guides to help us. We want to make sure the first shot is well-centred because we are going to be aligning the next shots to it as well as the guides.
Remember, we don't have to have it perfect, we will be going over it in passes. The more passes we do the more perfect it will be.
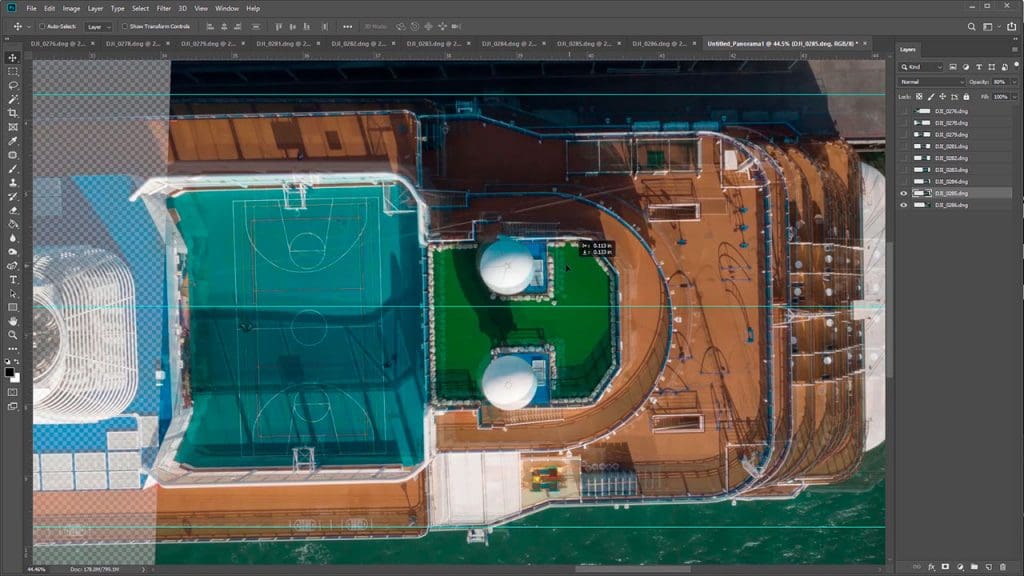
Now let's work on the next photo. Let's lower the opacity to see the overlap. I use about 80% opacity. Sometimes it's useful to use the difference blending mode too.
It's best to find key reference objects towards the center of the shot and try and match them. Matching the edges of the shots isn't a good idea, because of the large differences in perspective and there might be some remaining lens distortion.
Don't worry too much about things that don't line up on the edge of the frame. Focus on the lines and objects towards the centre of the frame.
Toggling layer visibility a lot helps me diagnose problems with the alignment.
When I have the move tool, I'm using the arrow keys to nudge the layer in different directions. This gives me fine control.
Fantastic, now this is the fun part. If you have a drawing tablet, it will make this part easier.
We are going to use layer masks to paint out the areas we don't want and hide the seams where the layers join.
So here I've added a mask to the layer above and I'll paint out the right side of it while finding a good place to hide the seam.
The cool thing about this technique is that you can choose the perspective that looks best for individual elements.
If you notice any alignment issues, go ahead and fix these as you go. You will probably keep finding places where you can perfect the alignment, that's normal.
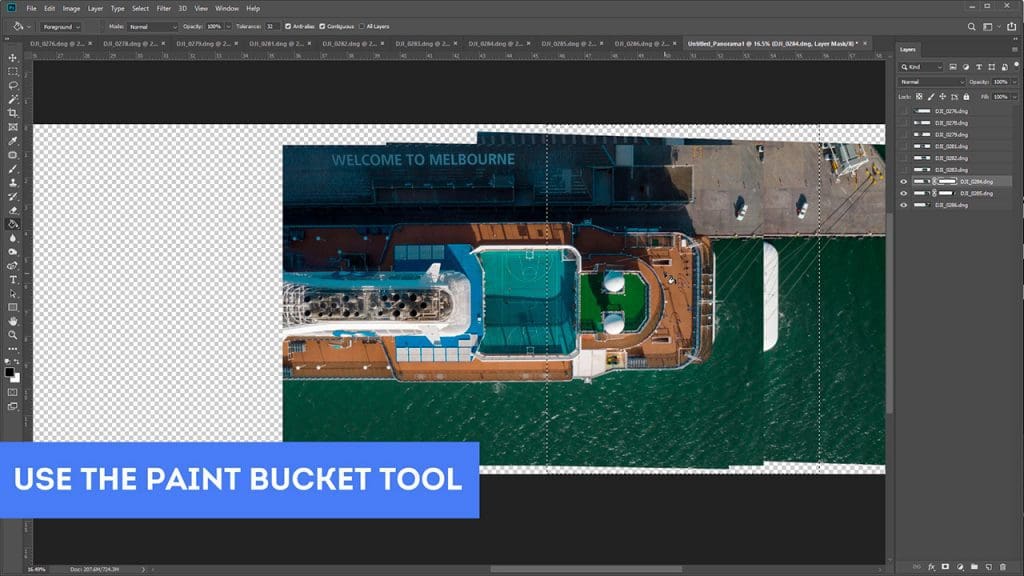
Ok, next layer. It's a good idea to just fill the right side of the layer mask with black, to get rid of the unwanted parts of the image. The aim here is to find a good spot for the seam.
Repeat the same steps: add a layer mask to the layer above and mask out the right side of the image, finding a good place to hide the seam.
Use the brush tool and switch between black and white to paint things out or add them in. You can press the x key to toggle between black and white when you have a layer mask selected. It makes it faster.
Use a soft brush, this creates a smoother transition between the photos, but sometimes it's a good idea to use a hard brush to hide the seam within a feature, like a barrier.
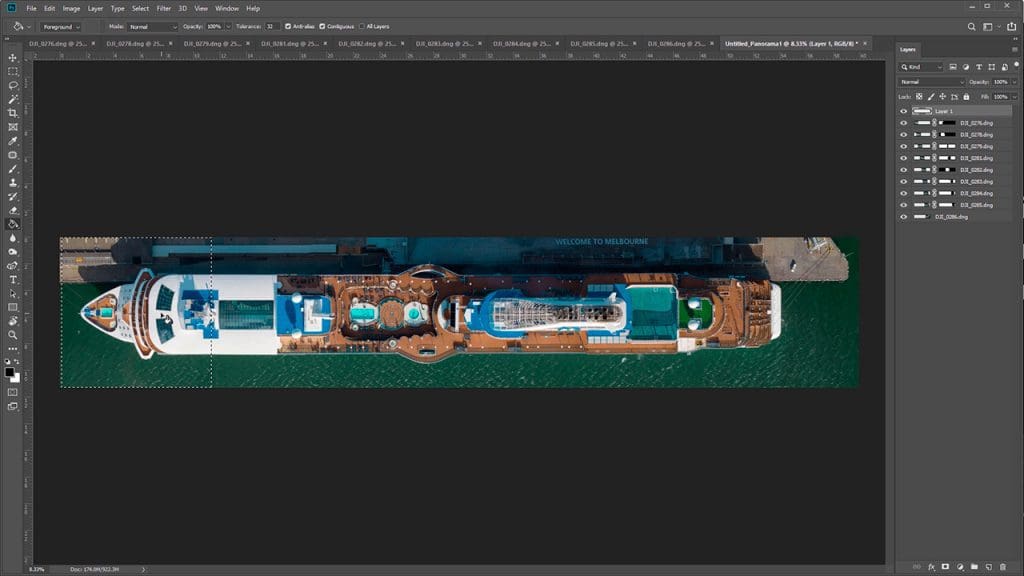
Once you are satisfied that all the images are aligned, and there are no visible seams or mistakes with the masking, you are ready for the next step.
If you need the image for a high-resolution print, you are done. Just export the image in a print-ready format (consult with your printer for more details).
If you want to post your drone panorama to Instagram, here is the method I use to break the image into squares.
Create a new layer and using the rectangle marquee tool hold down shift to create a square.
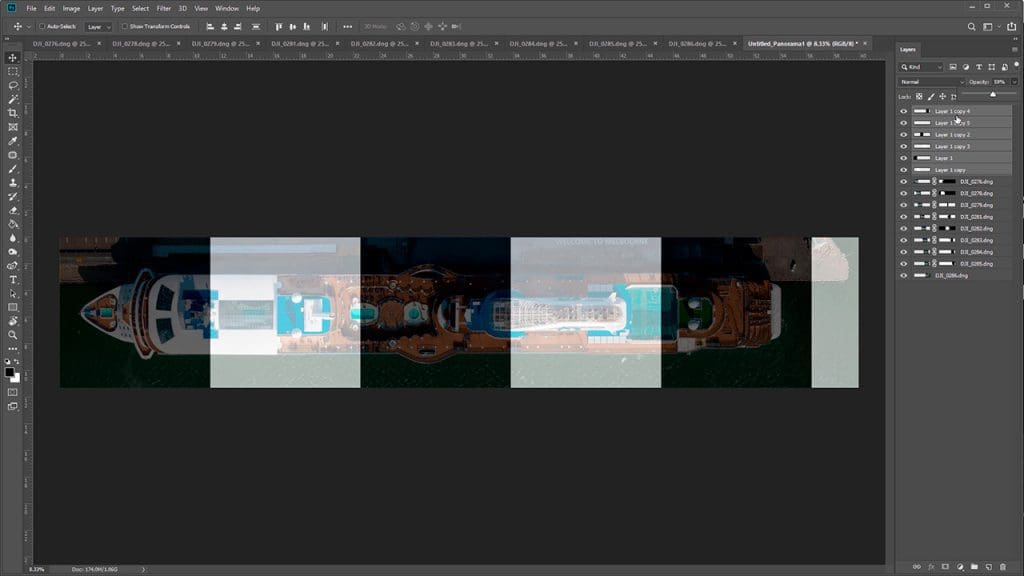
Fill the square with black for example, then copy the layer and invert it, lower the opacity to 50%.
Now create enough copies of the squares to cover the image.
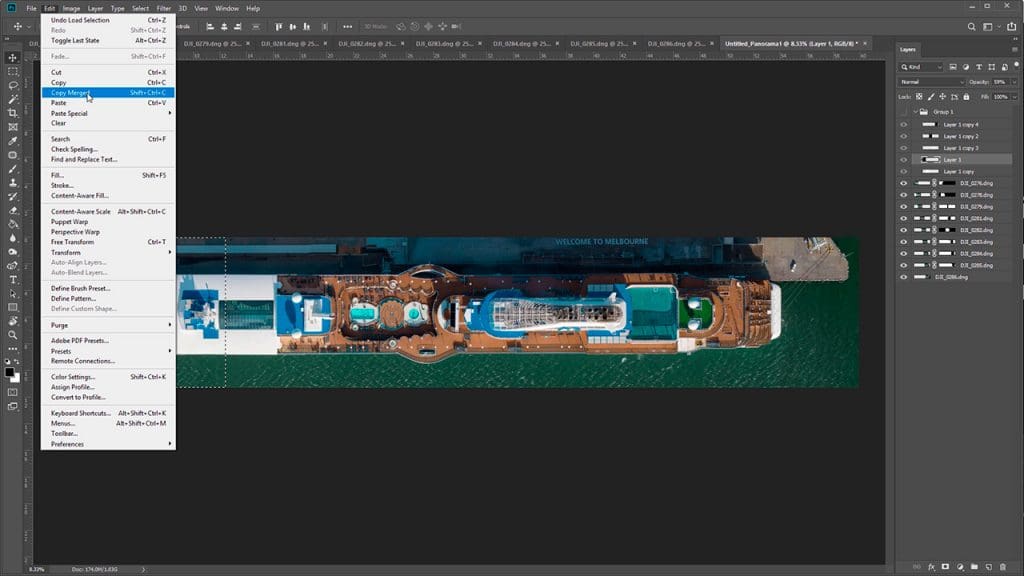
Choose how you want to segment your image. Now you can control click the layer to create a selection. Then go to Edit > Copy Merged.
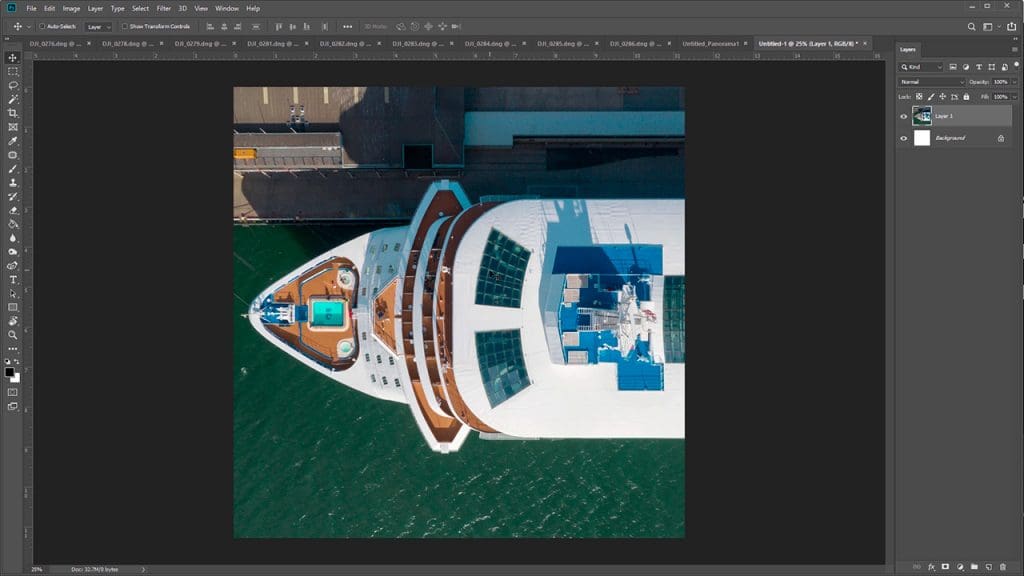
Next, go to file > new and paste the image here. I like to repeat the steps to copy all the segments into one document, then export 1 layer at a time.
And that's it! If you have any questions just put them down in the comment section and let me know if you found the tutorial helpful.
Don't forget to show me your drone panorama, by tagging me on Instagram or using the hashtag #dronepanos
And if you want to learn how to add location markers to drone footage, check this article out.
Cya, my friend!